-
1. Prerequisites
- An active Eventleaf account.
- Your event is already created in your Eventleaf online dashboard.
- A mobile device with internet connectivity.
-
2. Installing the Eventleaf Check In App
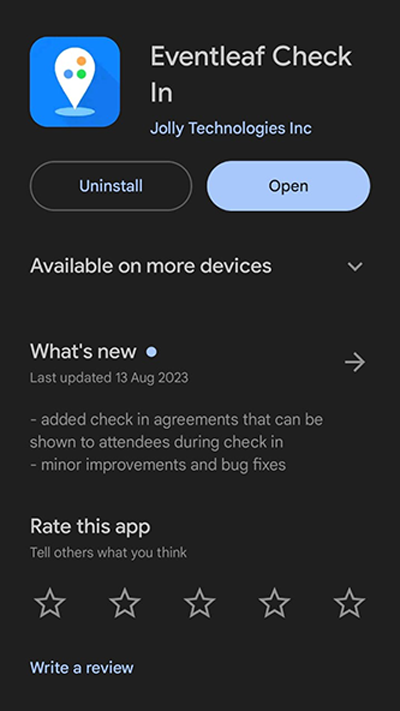
- Navigate to your device's app store (Google Play for Android, App Store for iOS). Search for "Eventleaf Check In."
- Download and install the app.
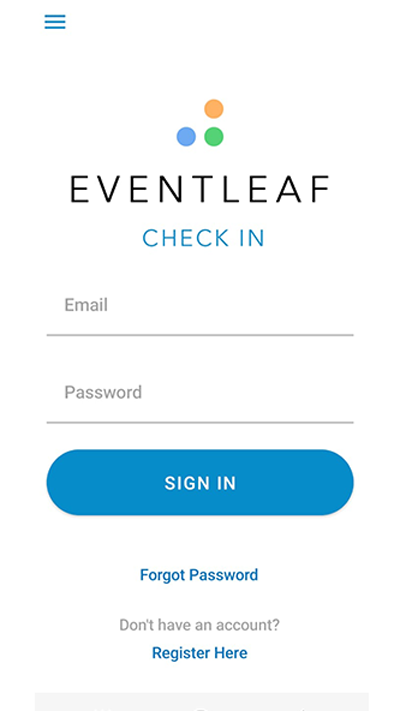
- Once installed, open the app and log in using your Eventleaf account credentials.
-
3. Checking In Attendees
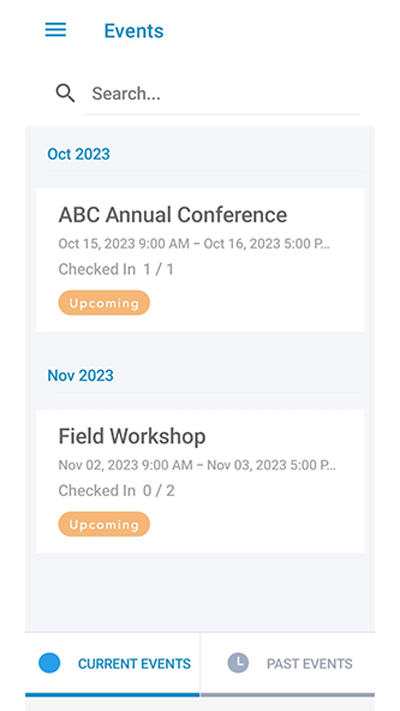
- Once logged in, you'll see a list of your events. Tap on the event you want to manage.
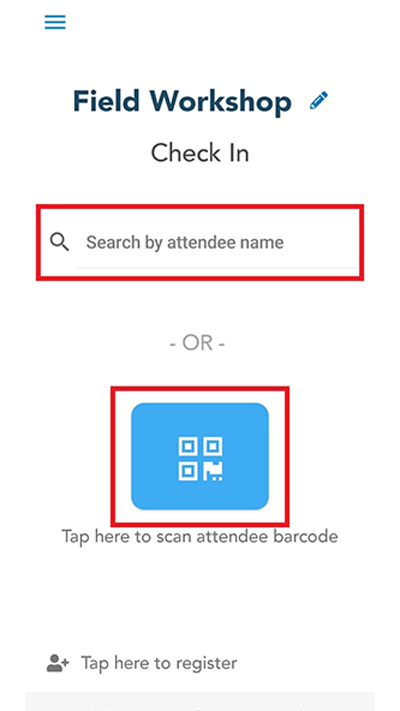
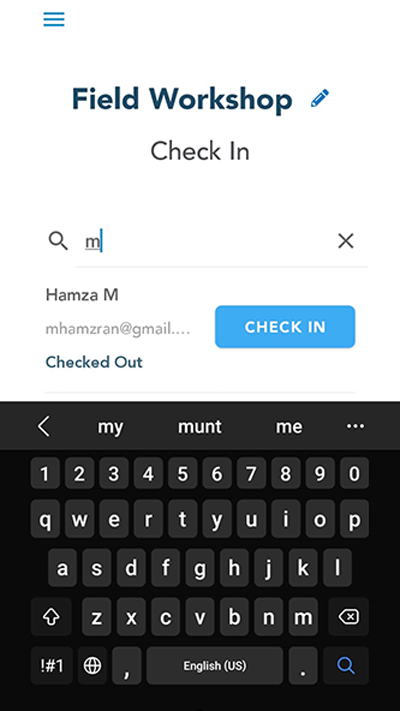
- When an attendee arrives to check in, search for their name by entering the first few letters or scanning the QR code in their confirmation email.
- Once the attendee's registration info is displayed, tap on it or on the CHECK IN button.
- A confirmation will appear, indicating the attendee has been successfully checked in.
- Repeat for all attendees.
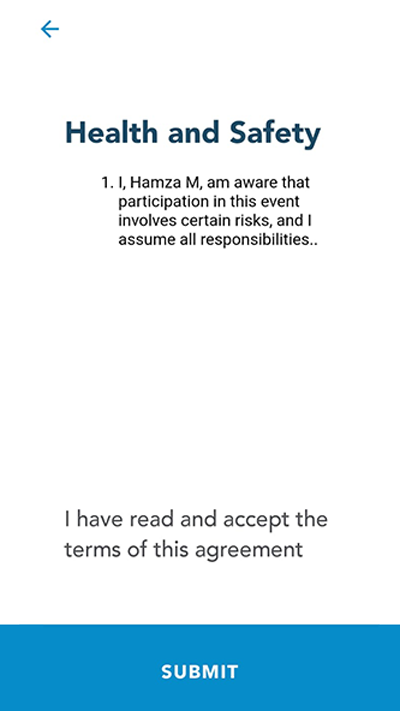
- Note: If you have enabled the check-in agreements feature from Eventleaf.com, the contract will be displayed and the attendee will need to acknowledge it before you can check them in.

Related Article: How to Use Eventleaf Check In Agreements
-
4. Checking Out Attendees
- When an attendee is ready to leave, search for their name or scan their QR code.
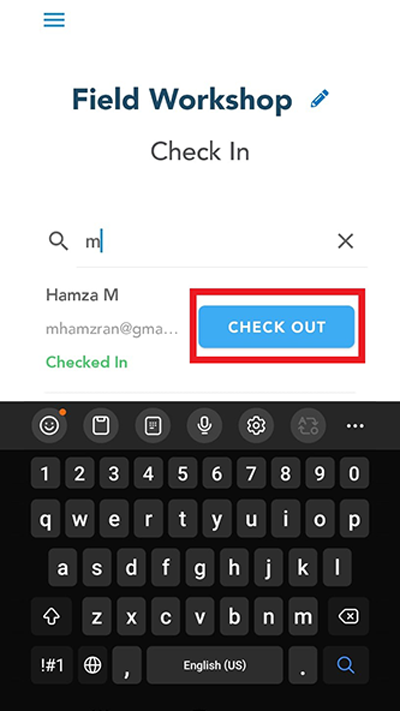
- Tap on the CHECK OUT button or on their name to check them out of the event.
- A confirmation will display, signifying the attendee has been checked out.
- Continue as needed for other attendees.

-
5. Enabling Attendee Self Check In/Out
You can easily set up the Eventleaf mobile app in kiosk mode and allow attendees to check themselves in or out. This would reduce the need for staff at the entry points and speed up the check-in process. Here's how to set it up:
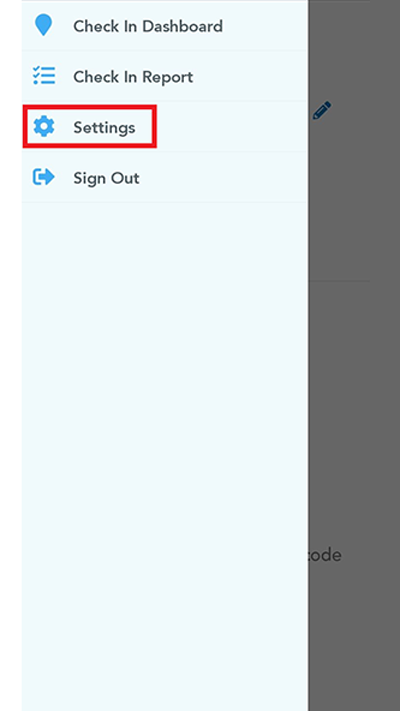
- Tap on the hamburger menu on top left of the app’s screen, then tap on Settings.
- On the next screen, select the event and session for which you want to enable attendee self check in and click on Usage Mode.
- On the next page, scroll down to Attendee Self Check In Kiosk. Select the minimum number of characters you want the attendees to enter for searching their name. Check on Allow check out if you want to enable attendees to sign out themselves.
- Click on SELECT.
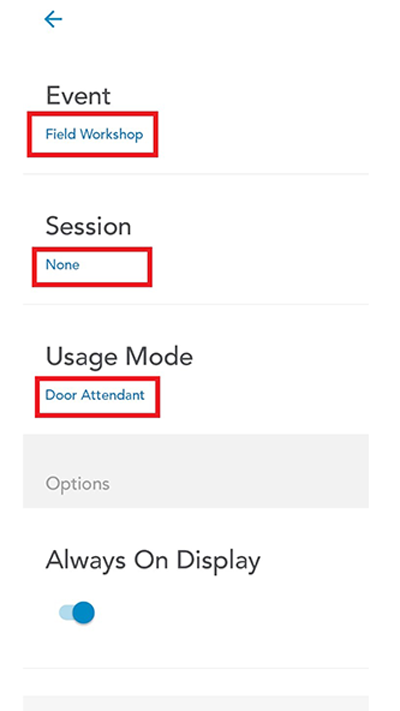
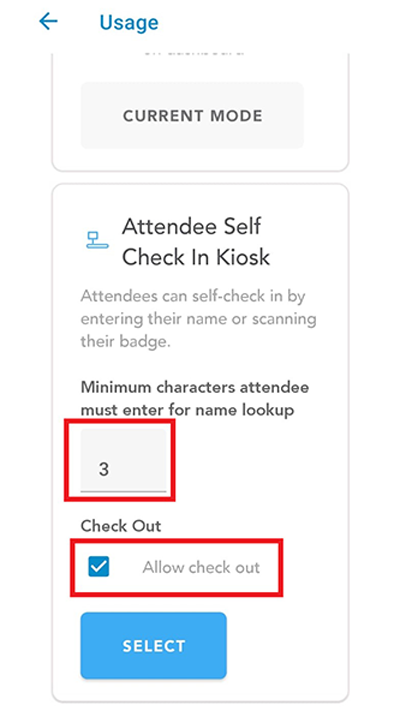
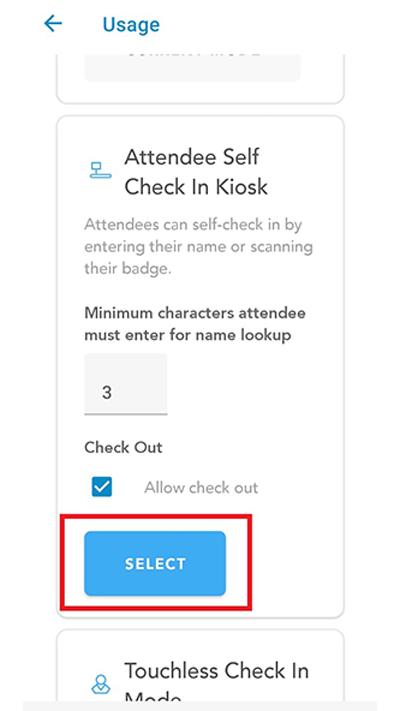
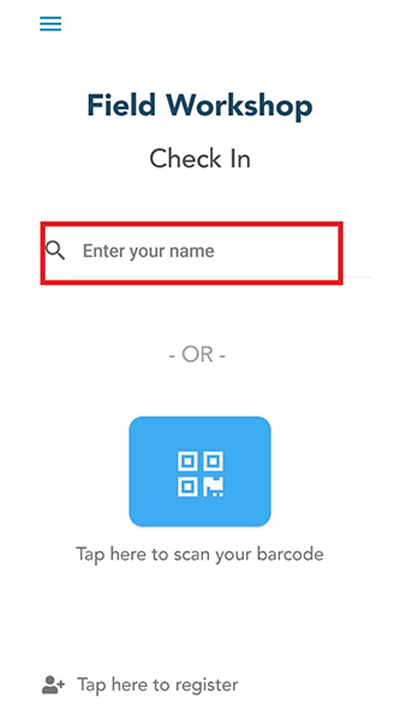
The Attendee Self Check In/Out is now enabled. The prompt “Enter your name” will appear on the check-in screen.
-
6. Enabling Touchless Attendee Check In
- Select the event for which you want to enable touchless check in.
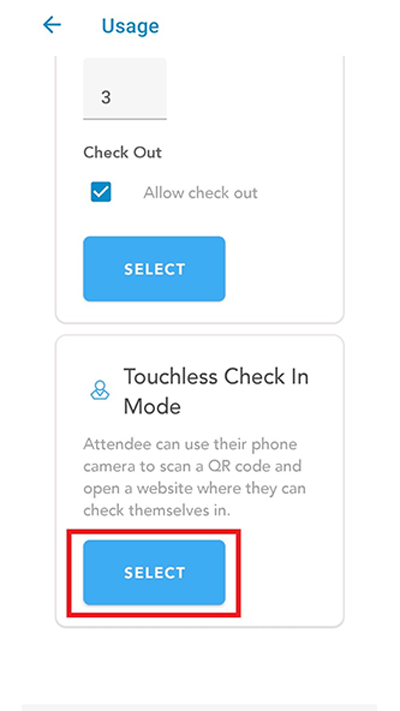
- Click on Settings > Usage Mode. Scroll down and select Touchless Check In Mode.
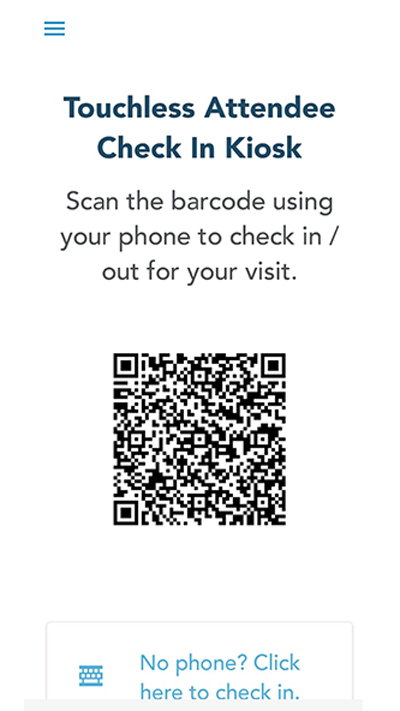
- Touchless check in is enabled. A QR code will appear on the screen and attendees will be able to check in/out by scanning the QR code with their phone.
-
7. Troubleshooting & FAQs
-
Issue: I can’t access the settings when I click on the menu.
Solution: The app is running in Attendee Self Check In mode. You’ll have to log in again to access the settings.
-
Issue: I can’t access the settings when I click on the menu.
Solution: The app is running in Attendee Self Check In mode. You’ll have to log in again to access the settings.
-
Issue: The app isn't recognizing an attendee.
Solution: Ensure the attendee is registered for the event in your online Eventleaf dashboard.
-
Issue: QR code scanning isn't working.
Solution: Check your device's camera permissions for the app.
-
FAQ: Can multiple staff members use the app simultaneously?
Answer: Yes, multiple devices can be logged into the Eventleaf Check In app, allowing for multiple check-in points.
-
FAQ: What if an attendee forgets to check out?
Answer: While it's ideal for attendees to check out, you can manually check them out if necessary.
For further assistance, visit the Eventleaf How To Guides or contact customer support.
-