-
Eventleaf allows you to create reminder emails. These emails can be sent to either,
-
Invitees who have already registered
-
Invitees who have registered after a certain date
Reminders can only be sent once an Event is published
-
-
Creating a reminder for People who have registered
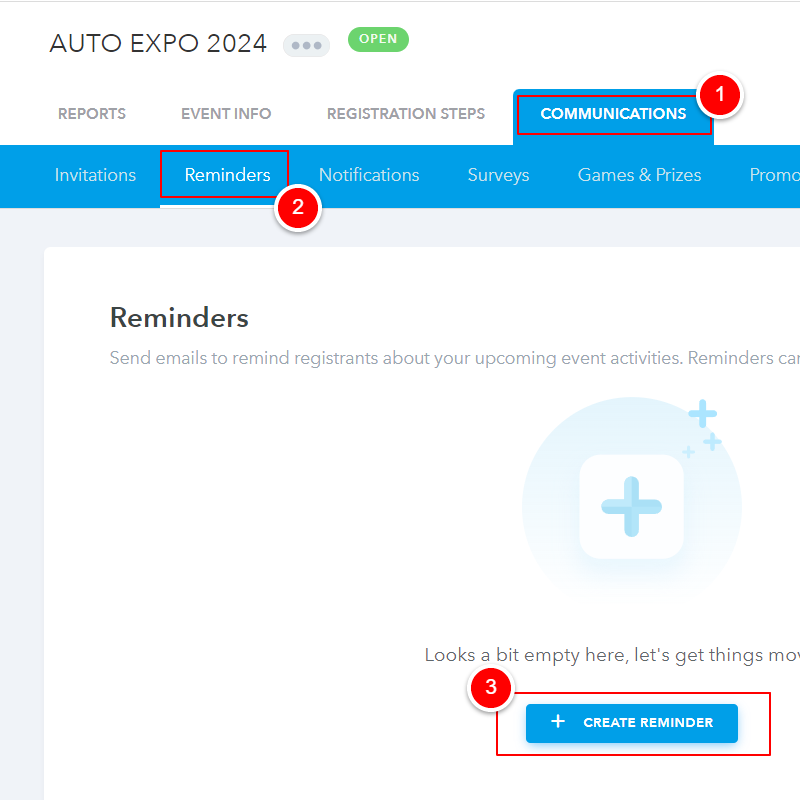
Go to Event > Communications > Reminders > Click + to create one > Enter email name > Click create
-
Go to Event and click Communications
-
Select Reminder
-
Click + sign to create a reminder email
-
Enter Reminder email name
-
Click Create

Upon successful creation message, system redirects user to email configuration screen allowing event planners configure send settings of the email manage other email controls.
-
-
-
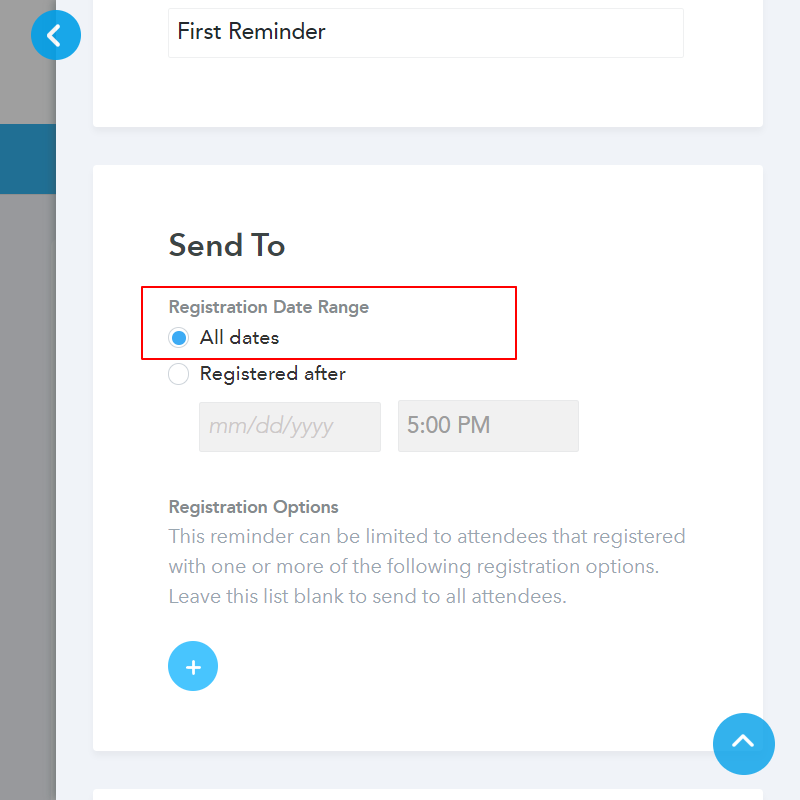
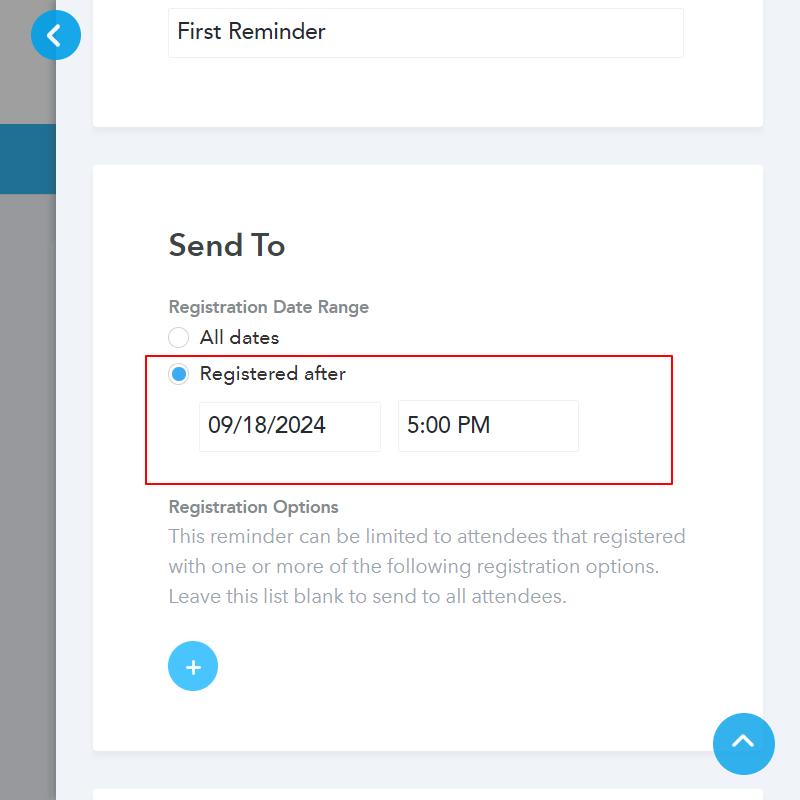
Configure Send to setting - People who have registered
-
Check Only those who registered (if you wish to send reminders to a subset of registrants who signed up after certain date/ time)
-
-
Configure Additional email settings
-
Skip recipients with emails that bounced: If the system previously identified an email address to be incorrect/ unable to receive emails then it will be excluded
-
Skip recipients that unsubscribed:Anyone who has previously unsubscribed from receiving emails will be excluded

-
-
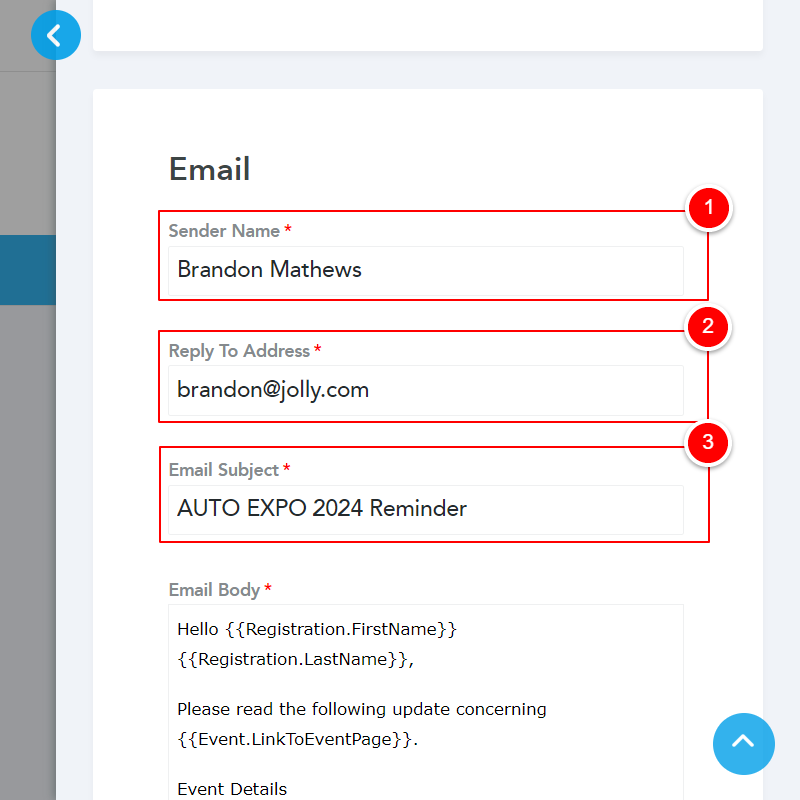
Configure email details and sender options
-
Enter Send name - Invitees would receive the email from this address
-
Enter Reply to Address - Upon receiving the invite, all invitee replies will be sent to this email address. Example: You can choose
-
Enter Email subject
-
Configure Email body using tools menu
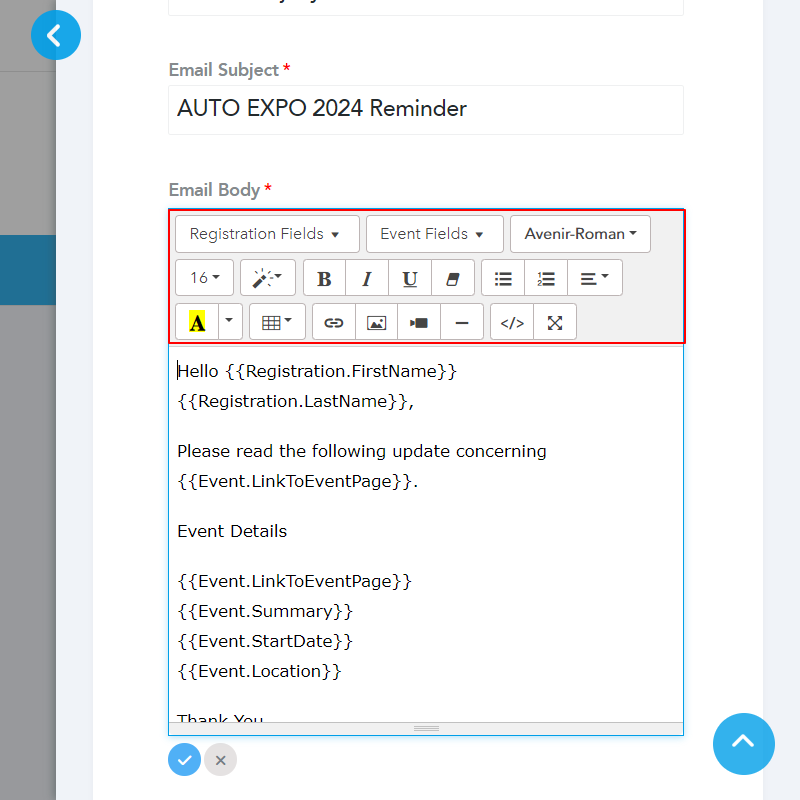
We suggest using registration fields to personalize the email
-
-
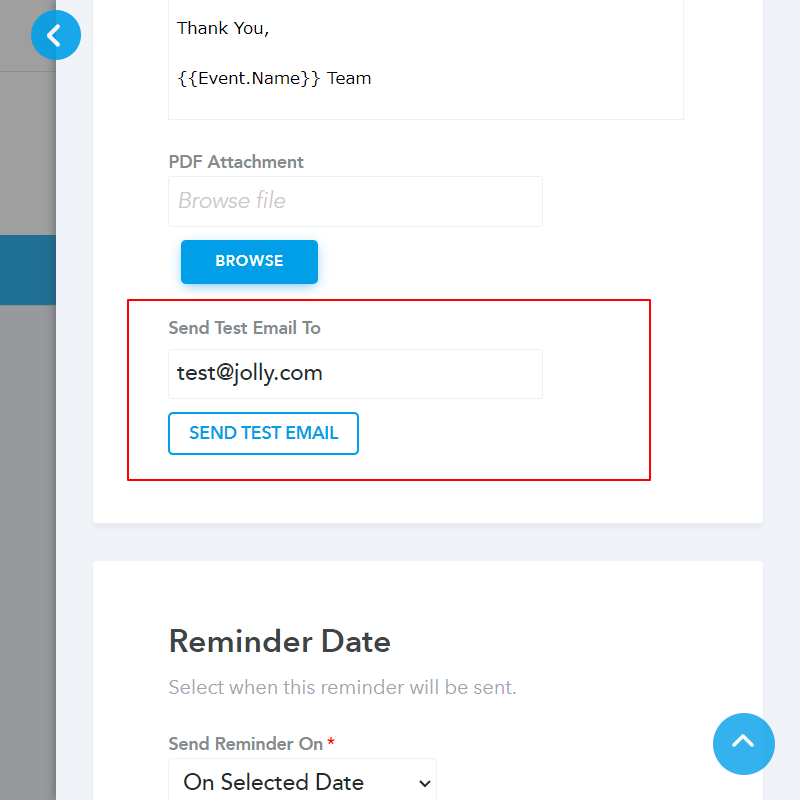
Sending a Test Email
-
Enter an email address
-
Click Send Test email
-
-
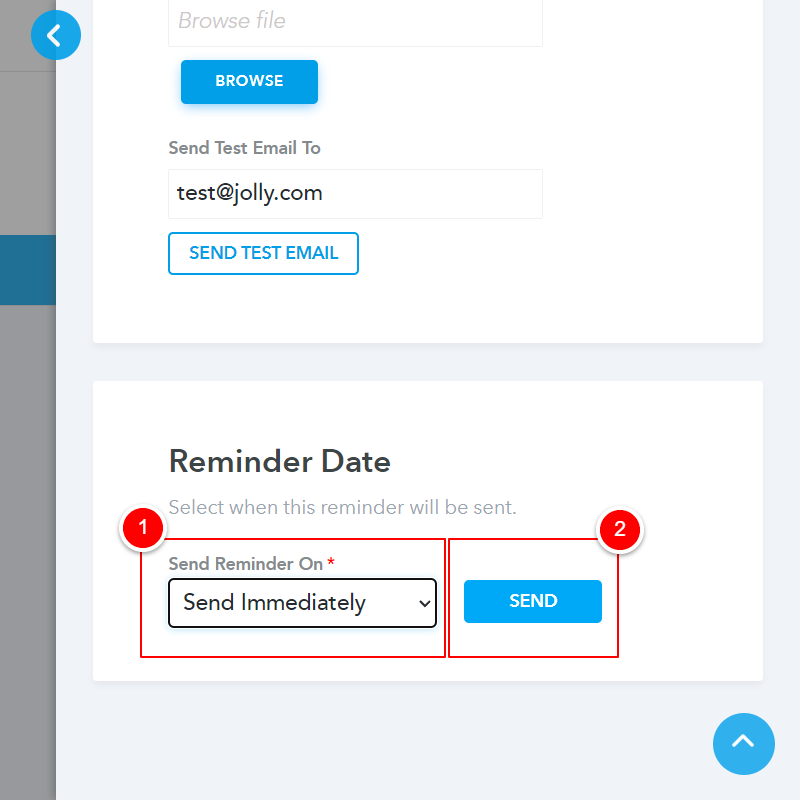
Choose send settings.
To send an email immediately choose Send Immediately > Click send
-
Choose Send immediately (Event should be published)
-
Click Send
-
-
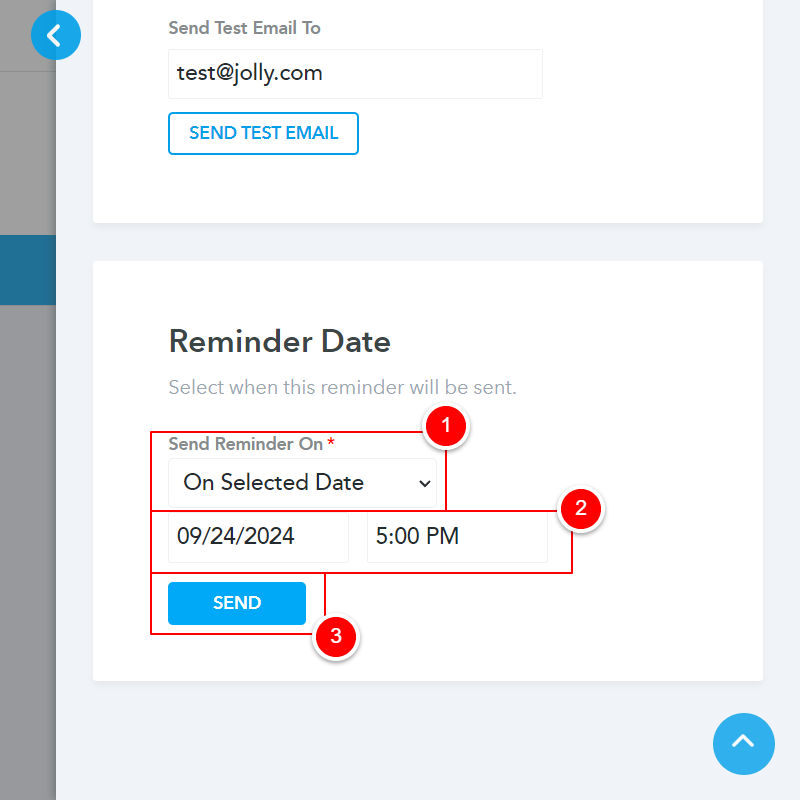
To schedule an email for later click On Selected Date > Enter send date and time > Click Send
-
To schedule an email click "On Selected Date"
-
Enter send date & time
-
Click Send
-
-
Creating a reminder for People who did not respond to invitation
Go to Event > Communications > Reminders > Click + to create one > Enter email name > Click create
-
Go to Event and click Communications
-
Select Reminder
-
Click + sign to create a reminder email
-
Enter Reminder email name
-
Click Create
-
-
Upon successful creation message, system redirects user to email configuration screen allowing event planners configure send settings of the email manage other email controls.
-
Configure Send to setting - People who did not respond to invitation

-
Configure Additional email settings
-
Skip recipients with emails that bounced: If system identified an email address to be incorrect/ unable to receive emails while a previous email was sent will be excluded
-
Skip recipients that unsubscribed: Anyone who has previously unsubscribed from receiving emails will be excluded

-
-
-
Configure email details and sender options
-
Enter Send name - Invitees would receive the email from this address
-
Enter Reply to Address - Upon receiving the invite, all invitee replies will be sent to this email address. Example: You can choose
-
Enter Email subject
-
Configure Email body using tools menu
-
-
We suggest using registration fields to personalize the email
Sending a Test Email
-
Enter an email address
-
Click Send Test email
Choose send settings.
To send an email immediately choose Send Immediately > Click send
-
Choose Send immediately (Event should be published)
-
Click Send
To schedule an email for later click On Selected Date > Enter send date and time > Click Send
-
To schedule an email click "On Selected Date"
-
Enter send date & time
-
Click Send
-